How to Read a Crochet Pattern: A Beginner's Guide to Abbreviations, Symbols & Stitch Counts
If you've ever opened a crochet pattern and thought, “What does all of this mean?”, you're definitely not alone. A pattern can look confusing at first because crocheters use abbreviations, symbols, parentheses, asterisks, and stitch counts instead of writing every instruction in full sentences. The good news is that once you understand a handful of common crochet pattern abbreviations and symbols, you can read most patterns much more easily. This guide will show you how to read a crochet pattern step by step, including written instructions, stitch counts, repeats, sizing, and crochet charts.
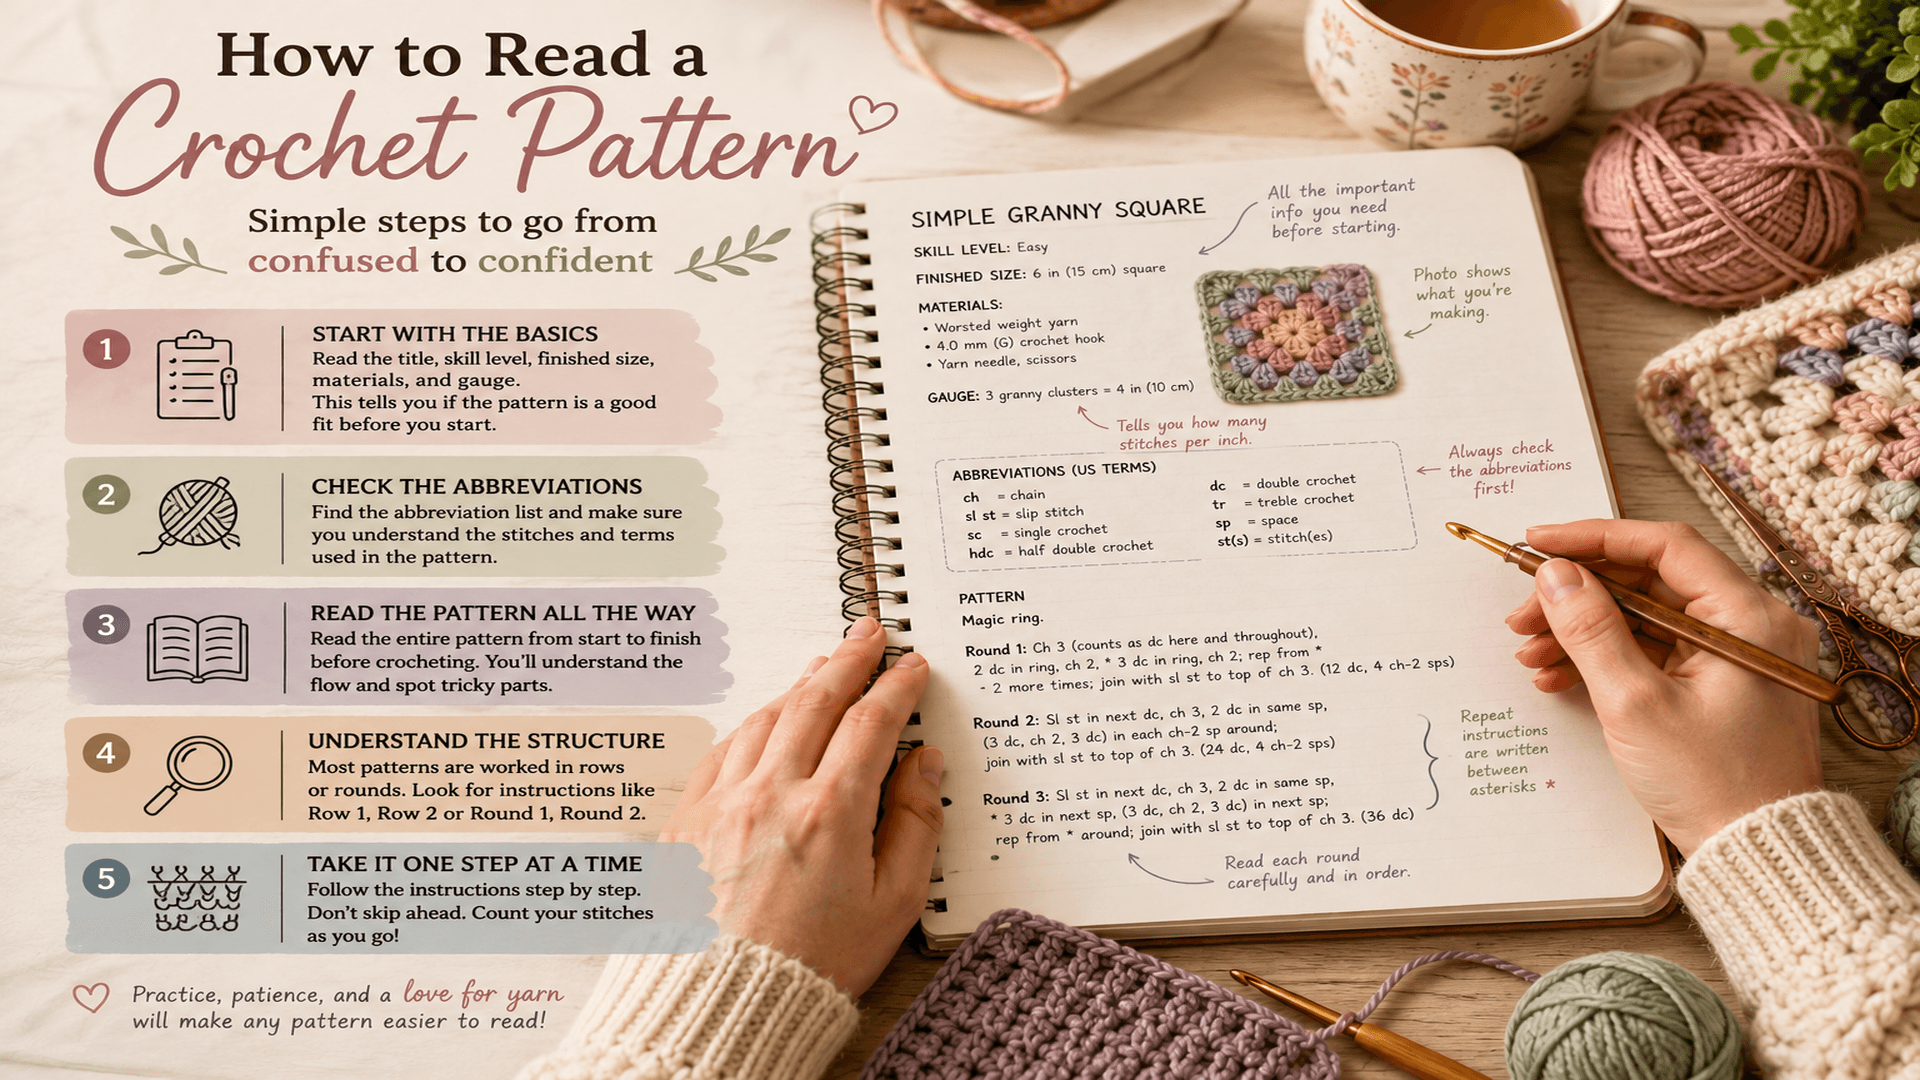
Start With the Pattern's Key
Before you begin crocheting, look for the designer's abbreviations section. This is especially important because not every designer uses exactly the same terminology.
Here are some of the most common US crochet abbreviations:
| Abbreviation | Meaning |
|---|---|
| ch | chain |
| sl st | slip stitch |
| sc | single crochet |
| hdc | half double crochet |
| dc | double crochet |
| tr | treble crochet |
| inc | increase |
| dec | decrease |
| st / sts | stitch / stitches |
| sp | space |
| rnd | round |
| rep | repeat |
| RS | right side |
| WS | wrong side |
Important: Check whether the pattern uses US or UK crochet terms before starting. For example, a US single crochet is called a double crochet in UK terminology.
Learn How One Pattern Row Is Written
Most written crochet patterns are simply a collection of short instructions telling you what stitch to make, where to make it, and how many times to repeat it.
For example:
Ch 20. Sc in 2nd ch from hook and across. (19 sts)
Instead of reading this as one complicated sentence, break it into pieces:
Ch 20 → Make 20 chain stitches.
Sc in 2nd ch from hook → Make your first single crochet in the second chain from your hook.
and across → Continue making one single crochet in each remaining chain.
(19 sts) → You should have 19 stitches when the row is complete.
This is the basic idea behind almost every written crochet pattern.
What Does an Asterisk Mean in Crochet Patterns?
The asterisk (*) is one of the most important symbols to recognize.
It usually tells you where a repeat begins.
For example:
*Sc in next 2 sts, dc in next st, ch 1; rep from * across.
The section after the asterisk is repeated until the pattern tells you to stop.
So rather than thinking of the instruction as one long sentence, think of it as:
sc, sc → dc, ch 1 → dc, ch 1 → dc, ch 1...
Some patterns use two asterisks or wording such as “repeat from *”, “rep around”, or “rep across.” Always check exactly where the repeat starts and where it ends.
Parentheses Can Mean Different Things
Parentheses are used in several ways, so this is one area where beginners can easily get confused.
Parentheses for Repeating Stitches
You might see:
(dc, ch 2, dc) 3 times
This means you work the entire sequence three times:
dc, ch 2, dc → dc, ch 2, dc → dc, ch 2, dc
Parentheses for Stitch Counts
At the end of an instruction, parentheses often show your expected stitch count:
Sc in each st across. (24 sts)
That means you should have 24 stitches when you finish.
This number is extremely useful. If your pattern says 24 stitches but you count 23, stop and check your work before continuing.
Parentheses for Different Sizes
Garment patterns often use parentheses to provide instructions for multiple sizes.
For example:
Ch 80 (90, 100, 110)
The first number may correspond to the smallest size, followed by the larger sizes.
Always check the pattern's sizing key before starting and mark the numbers that apply to your size.
Square Brackets and Grouped Instructions
Square brackets or parentheses can also group several stitches together.
For example:
[2 dc, ch 1, 2 dc] in corner space
Everything inside the brackets belongs to that instruction.
You would work:
2 double crochets → chain 1 → 2 double crochets
all into the specified corner space.
When you see several symbols grouped together, resist the temptation to work them separately. The grouping usually tells you that those stitches belong together.
What Does "In Next Stitch" vs. "In Space" Mean?
This small difference can completely change your finished project.
If a pattern says:
Sc in next st
insert your hook into the actual stitch.
If it says:
3 dc in next ch-2 sp
you are working into the space created by the chain, not into the individual chain stitches.
This distinction is particularly important when crocheting granny squares, lace patterns, motifs, and other open designs.
How to Follow Stitch Counts Without Getting Lost
Stitch counts are your built-in error detector.
Suppose your pattern says:
Rnd 4: Sc in each st around. (30 sts)
When you finish the round, count your stitches.
If you have:
30 stitches: Great — continue.
29 stitches: You probably missed a stitch.
31 stitches: You may have accidentally increased somewhere.
Don't ignore a wrong stitch count just because the fabric looks okay. One missed stitch can cause bigger problems several rows later, especially in amigurumi and shaped projects.
For beginners, placing a stitch marker at the beginning of each round or at important repeat points can make counting much easier.
How to Read Crochet Patterns Worked in Rounds
Patterns worked in the round may use either joined rounds or continuous rounds.
A joined-round instruction might look like:
Rnd 2: Ch 1, 2 sc in each st around. Sl st to first sc. (20 sts)
You work around the entire circle and then join the round with a slip stitch.
Amigurumi patterns commonly use continuous rounds:
Rnd 5: Sc in each st around. (24 sts)
You don't join at the end. Instead, you continue directly into the next stitch, usually using a stitch marker to identify the beginning of the round.
If you're working amigurumi, knowing which method the designer uses is essential because joining when the pattern expects continuous rounds can change the shape of your project.
How to Read a Crochet Chart
Written instructions aren't the only way to follow a crochet pattern. Many motifs, lace designs, granny squares, and colorwork projects use crochet charts.
A crochet chart replaces written stitch names with symbols.
Common crochet chart symbols include:
Oval or circle → chain
X or + → single crochet
T-shaped symbol → double crochet
Tall T with additional marks → taller stitches such as treble crochet
The exact symbols can vary, so always look at the chart's symbol key or legend.
For many crochet charts, you begin at the bottom and work upward. When crocheting flat rows, the direction can alternate from one row to the next.
If a chart looks confusing, don't try to memorize every symbol. Keep the legend beside you and translate one symbol at a time.
A Simple Way to Decode Any Crochet Pattern
When you're faced with a complicated instruction, break it into four questions:
1. What stitch am I making?
Look for sc, hdc, dc, tr, and so on.
2. Where does the stitch go?
Look for phrases such as “next stitch,” “chain space,” “around,” or “between.”
3. How many times do I do it?
Look for numbers, asterisks, parentheses, and repeat instructions.
4. What should my stitch count be afterward?
Check the number at the end of the row or round.
For example:
*Sc in next 3 sts, inc in next st; rep from * around. (30 sts)
Break it down:
3 single crochets → 1 increase → repeat around → finish with 30 stitches.
Once you start thinking this way, even complicated crochet patterns become much easier to follow.
Don't Start Crocheting Until You've Checked These Things
Before making your first stitch, take a couple of minutes to check:
Pattern terminology: Is it written in US or UK terms?
Hook size: Which crochet hook does the designer recommend?
Yarn weight: Are you using the same or a compatible yarn weight?
Gauge: Does the project require a specific gauge?
Sizing: If the pattern has multiple sizes, have you identified yours?
Special stitches: Are there stitches or techniques you've never used before?
Stitch count: Do you understand the expected count after the first row or round?
That five-minute preparation can save you from having to unravel half a project later.
The Best Beginner Habit: Read One Instruction Ahead
You don't need to memorize an entire pattern.
Instead, read the current instruction and quickly look at the next one before you begin.
This helps you notice things like:
an upcoming color change
a stitch increase
a decrease
a special stitch
a turning chain
a change from rows to rounds
With practice, you'll stop translating every abbreviation in your head. “Sc 2, inc, rep around” will eventually become something your hands understand almost automatically.
Final Takeaway
Learning how to read a crochet pattern is less about memorizing hundreds of abbreviations and more about understanding how crochet instructions are organized.
Start by learning the common crochet terms, then practice recognizing repeats, stitch counts, parentheses, brackets, turning chains, and chart symbols. Once those basics become familiar, you can move from simple beginner crochet patterns to more detailed amigurumi, granny squares, garments, and intricate motifs with much more confidence.
And remember: if you make a mistake, the stitch count is there to help you find it. Count often, use stitch markers when necessary, and don't be afraid to unravel a few stitches and try again.
Ready to make something?
Put your new skills to use with our free pattern collection.