How to Hide Yarn Ends in Crochet: A Simple Method for Secure, Invisible Finishing
Few things make a finished crochet project look less polished than loose yarn tails sticking out of the back. Whether you are finishing a blanket, joining granny squares, changing colors, or completing an amigurumi piece, knowing how to weave in crochet ends is one of those small skills that makes a huge difference. The good news is that you do not need complicated knots or special equipment. With a tapestry needle, a few inches of yarn, and the right weaving path, you can secure most crochet yarn tails neatly inside the fabric. The key is not simply hiding the end. You want to make it difficult for the tail to work its way back out when the project is stretched, handled, or washed. One of the most reliable approaches is to weave the yarn in one direction, reverse the path, and then make a final pass through a different section of the stitches. Changing direction creates additional friction and helps keep the tail in place.
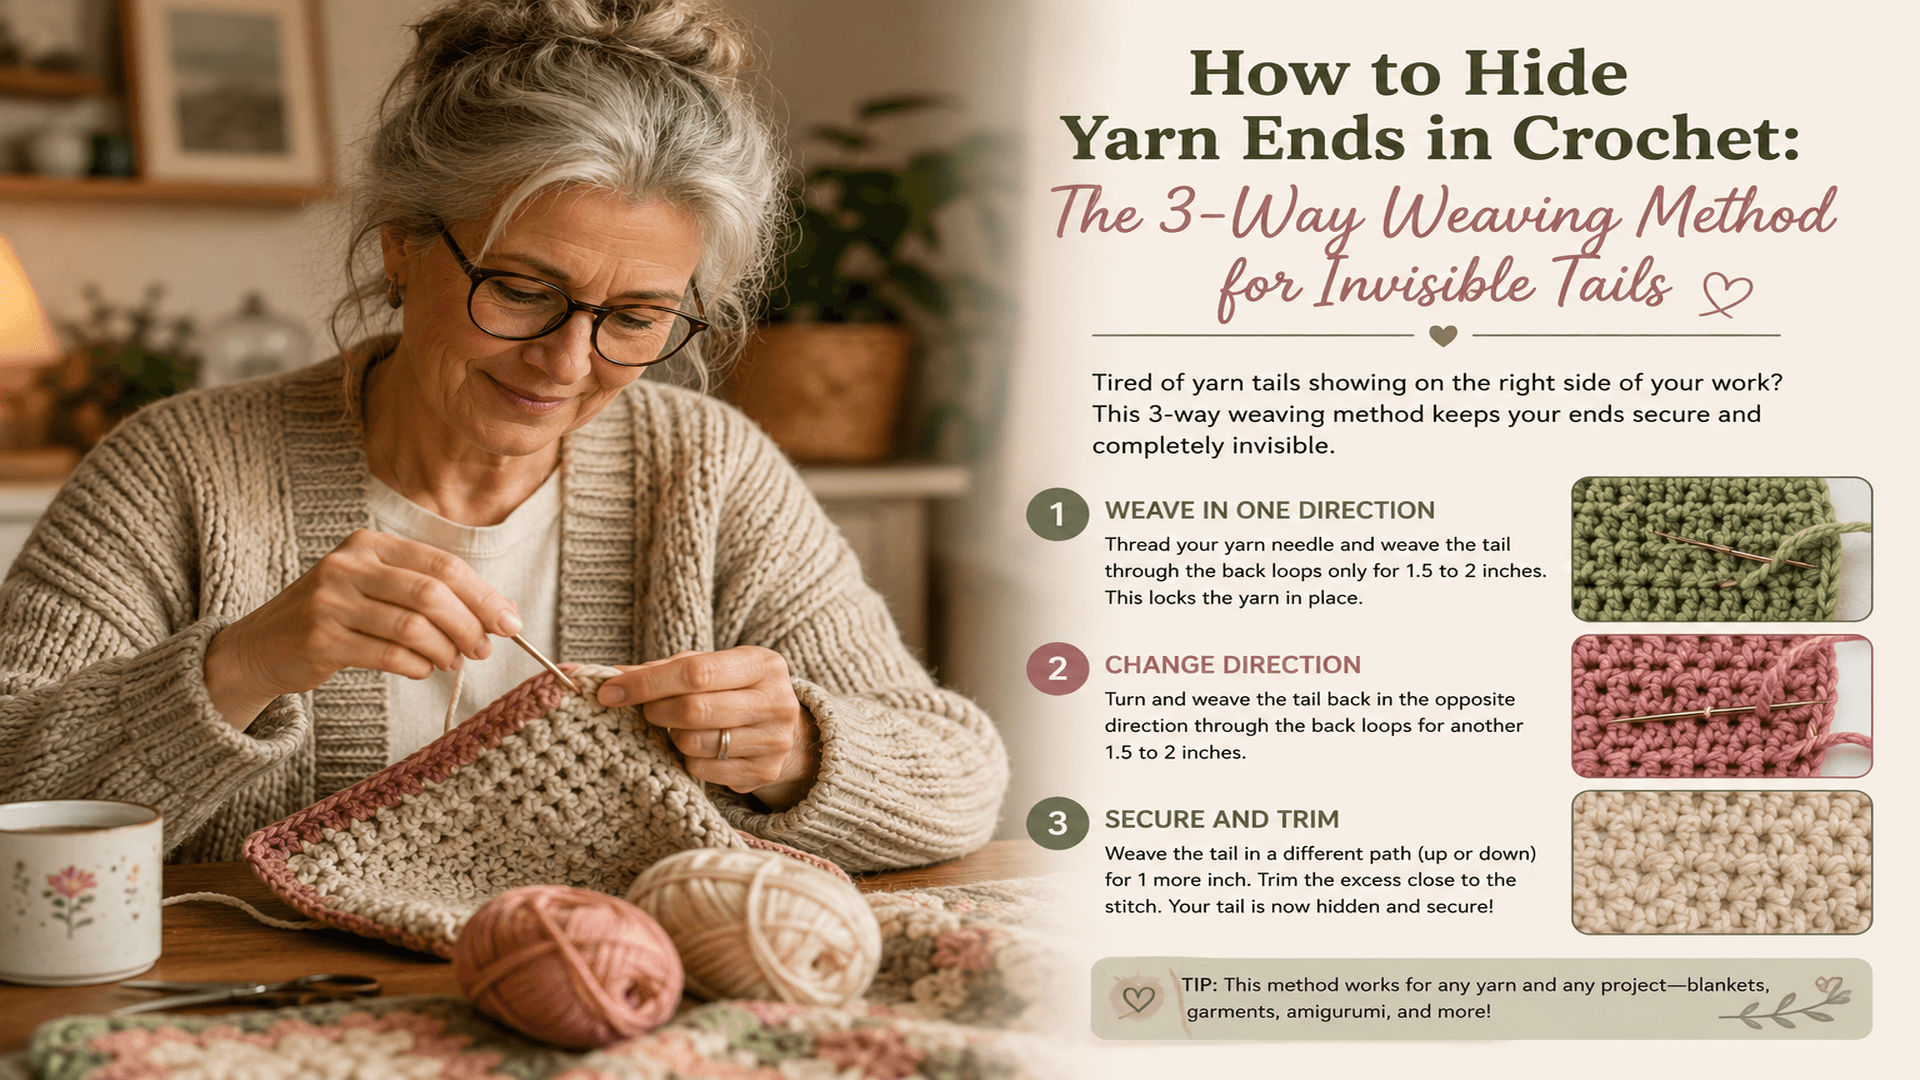
How to Hide Yarn Ends in Crochet: A Simple Method for Secure, What Does “Weave in Ends” Mean in Crochet?
When a crochet pattern tells you to weave in the ends, it means securing the loose yarn left after fastening off or changing yarn.
Instead of leaving the tail hanging or tying a bulky knot, you thread it onto a blunt tapestry or yarn needle and work it through the existing stitches on the wrong side of the project.
This finishing technique is useful for almost everything:
Crochet blankets
Granny squares
Amigurumi
Crochet hats
Sweaters and cardigans
Scarves
Baby clothes
Home décor
Colorwork projects
A properly woven tail should be difficult to see from the right side and secure enough that normal handling does not pull it back out.
How Long Should a Crochet Yarn Tail Be?
Before cutting your yarn, give yourself enough length to work with.
A 6-inch to 8-inch tail is a practical starting point for many projects. If the yarn is particularly thick, the stitches are dense, or the join needs extra security, leaving a little more length can make the finishing process much easier. Several established crochet guides recommend leaving roughly this amount rather than trying to work with a very short tail.
A tail that is only an inch or two long might technically be possible to hide, but you will have much less room to weave it through multiple stitches.
Simple rule: leave more yarn than you think you need. You can always trim the excess later.
The Easy Way to Weave in Crochet Ends
1. Fasten Off and Leave Your Tail
Finish your final stitch, cut the yarn, and pull the tail through the active loop to secure it.
Do not cut the tail flush with the project yet. Leave enough yarn to comfortably thread a tapestry needle.
If you are changing colors rather than finishing the entire project, leave a similar length on both yarn ends so they can be secured later.
2. Thread a Blunt Tapestry Needle
A tapestry needle or yarn needle with a large eye is ideal.
A blunt needle is useful because you are trying to travel underneath existing crochet stitches rather than pierce straight through the yarn. Bent-tip needles can also make it easier to navigate tight or dense crochet fabric.
Choose a needle that is large enough for your yarn but not so large that it stretches the stitches apart.
3. Work on the Wrong Side
Turn your crochet project so the wrong side is facing you.
Look for the denser portions of the stitches and identify a path where the yarn can travel underneath several stitch loops.
Try to keep the tail inside similarly colored sections whenever possible. This is especially helpful with stripes and other color-changing crochet patterns.
4. Weave Through Several Stitches
Push the needle underneath several nearby stitch loops and pull the yarn through.
Do this gently.
The goal is to secure the tail without tightening the fabric. If you pull too hard, the stitches around your weaving path can become distorted or puckered.
For dense single crochet, you may need to wiggle the needle slightly to find a comfortable path through the stitch structure.
5. Reverse Direction
This is the part beginners often skip.
After weaving the tail in one direction, turn around and weave it back through nearby stitches.
Changing direction means the yarn is no longer relying on one straight path to stay in place. The extra contact between the tail and surrounding fibers increases friction and makes it less likely to slide free.
For additional security, you can make another short pass in a different direction.
Think of it as creating a small zigzag inside the fabric rather than simply running the yarn through a straight tunnel.
How to Hide Yarn Ends So They Don't Show
Security is only half the job. You also want the finished tail to disappear visually.
The easiest trick is to follow the natural direction of the stitches.
On the wrong side of your work, look for the legs, posts, and horizontal strands that make up the fabric. Guide your needle underneath these structures rather than taking a large, obvious path across the back.
With colorwork, try to keep a yarn tail within its matching color section.
With textured stitches, hide the tail behind the thicker areas of the pattern.
With granny squares, weaving around the denser corner or edge stitches can help keep the finishing work hidden.
Once the tail has been woven securely, trim the remaining end close to the fabric.
Should You Knot Crochet Ends?
Usually, you do not need a bulky knot if you weave the tail properly.
A knot can create a noticeable bump, particularly in garments, blankets, and other projects where the back may come against the skin.
Instead, the security comes from multiple changes of direction and enough contact with the surrounding stitches.
That said, the best finishing method depends on the project. A high-use item, a heavily stretched garment, or an amigurumi seam may justify extra reinforcement.
How to Weave in Ends on Different Crochet Projects
Granny Squares
Granny squares can produce a surprising number of yarn tails, especially when several colors are involved.
Work each tail into the wrong side of the square and keep the weaving path relatively short and close to the color section where it originated. This makes the finished square cleaner and reduces the chance of a contrasting strand becoming visible.
Amigurumi
Amigurumi deserves extra attention because the pieces are stuffed, stretched, and frequently handled.
For small pieces, weave the yarn through several dense stitches on the inside or wrong side before trimming. If the tail is connected to a sewn seam, make sure the surrounding construction is already secure before hiding the end.
Crochet Blankets
Blankets involve a lot of movement and washing, so avoid relying on a single short pass.
For blanket edges, color changes, and granny-square joins, weave the tail in multiple directions through dense stitches before trimming it.
Crochet Clothes
Garments need a balance between security and flexibility.
Do not pull your woven tail so tightly that it changes the tension of the fabric. A secure finish should disappear into the stitches without creating a stiff spot or puckered area.
What If Your Yarn Tail Is Too Short?
It happens.
If you accidentally cut a tail too close to the fabric, do not immediately panic.
For a slightly short tail, a smaller tapestry needle may give you enough control to weave it through nearby stitches. You can also use a crochet hook to pull a short end through dense sections when a needle is difficult to maneuver.
If the tail is extremely short, the better solution may be to reinforce the area through a nearby seam or join rather than trying to force the tiny end through several stitches.
The important thing is not to create a bulky knot simply because the tail is difficult to handle.
Can You Weave in Ends With a Crochet Hook?
Yes.
A yarn needle is usually easier for controlled finishing, but a crochet hook can be useful when you do not have a tapestry needle available.
With the hook method, you pull the yarn tail through nearby stitches on the wrong side of the project. It can be particularly convenient for small projects and quick color changes.
For very dense crochet, however, a tapestry needle often gives you more control over the exact path of the tail.
The Biggest Mistakes to Avoid
Cutting the tail too short: You need enough length to make several passes.
Weaving in only one direction: A straight path can work loose more easily than a path that reverses direction.
Pulling too tightly: This can pucker the fabric and alter the surrounding stitch tension.
Weaving through open spaces: Large gaps can make the tail more visible and give it less friction.
Using a sharp needle: A sharp point can split yarn fibers instead of smoothly passing beneath the stitches.
Trimming before securing: Always finish weaving first and cut the remaining tail afterward.
Ignoring the wrong side: Whenever possible, do your finishing where the work will be least visible.
A Quick Finishing Checklist
Before you call your crochet project finished, check:
Have all yarn tails been secured?
Did you weave each tail through several stitches?
Did you reverse direction at least once?
Is the fabric still lying flat?
Can you see the tail from the right side?
Are the ends trimmed close to the fabric?
Have you checked color-change areas and seams?
Taking an extra few minutes here can make the difference between a project that looks homemade and one that looks professionally finished.
Frequently Asked Questions
How do you hide yarn ends in crochet?
Thread the tail onto a blunt tapestry needle and weave it through several stitches on the wrong side of the fabric. Reverse direction and make another pass, then trim the remaining yarn close to the fabric.
How many stitches should I weave my yarn through?
There is no universal number because stitch size, yarn weight, and project type all matter. The important principle is to use enough surrounding fabric to create friction and to change direction rather than relying on one short straight pass.
Why do my crochet ends keep coming loose?
Common reasons include tails that are too short, weaving through too few stitches, pulling the yarn too tightly, or using a single-direction path. Reversing direction and weaving through a denser section of the fabric can improve security.
Can I crochet over yarn ends instead of weaving them in?
Sometimes you can crochet over a yarn end as you work, particularly for certain color changes or construction techniques. However, many crocheters prefer to weave the finished tail through the fabric afterward because it gives them more control over where and how securely the end is hidden.
What is the best needle for weaving in crochet ends?
A blunt tapestry or yarn needle with a large enough eye for your yarn is a good general choice. Bent-tip needles can be helpful when navigating dense crochet stitches.
The Finishing Step That Makes Crochet Look Professional
Weaving in ends may not be the most exciting part of crochet, but it is what turns loose yarn tails into a finished piece.
Instead of rushing through the last few minutes, treat finishing as part of the actual crochet process. Leave a useful tail, work through the denser parts of the stitches, change direction, keep your tension relaxed, and trim only after the yarn is secure.
Once you get comfortable with the technique, weaving in crochet ends becomes almost automatic—and your blankets, amigurumi, garments, and accessories will have a much cleaner finish.
Explore AlbaCrochet digital PDF patterns for projects with clear finishing instructions, assembly guidance, and step-by-step crochet support.
Next Steps
Continue Learning

What Yarn Is Best for Baby Items? Safe, Soft & Machine-Washable Fiber Guide
Quick Summary: The best yarn for baby crochet is generally soft, smooth, durable, and easy to wash. Cotton, washable wool blends, and quality acrylic or acrylic blends can all work well depending on the project. Look for reputable safety certifications such as OEKO-TEX® STANDARD 100 when available, follow the yarn's care instructions, and avoid loose, shed-prone fibers and detachable decorations on items intended for babies.
Read tutorial
Aluminum vs. Ergonomic Crochet Hooks: Which Is Best for Speed, Comfort & Control?
If you have ever crocheted for a few hours and ended up with a tired thumb, stiff fingers, or a sore wrist, your crochet hook might be part of the problem. Traditional aluminum crochet hooks are simple, lightweight, durable, and often inexpensive. They have been a favorite for generations. Ergonomic crochet hooks, on the other hand, use wider, shaped, or cushioned handles designed to make the hook easier to hold during longer sessions. So which is actually better? The honest answer is: there isn't one perfect crochet hook for everyone. Your hand size, grip style, crochet speed, yarn, and the type of projects you make all matter. An ergonomic hook can make a huge difference for some crocheters, while another person may prefer the slim precision of a classic aluminum hook. Let's look at what really changes between the two.
Read tutorial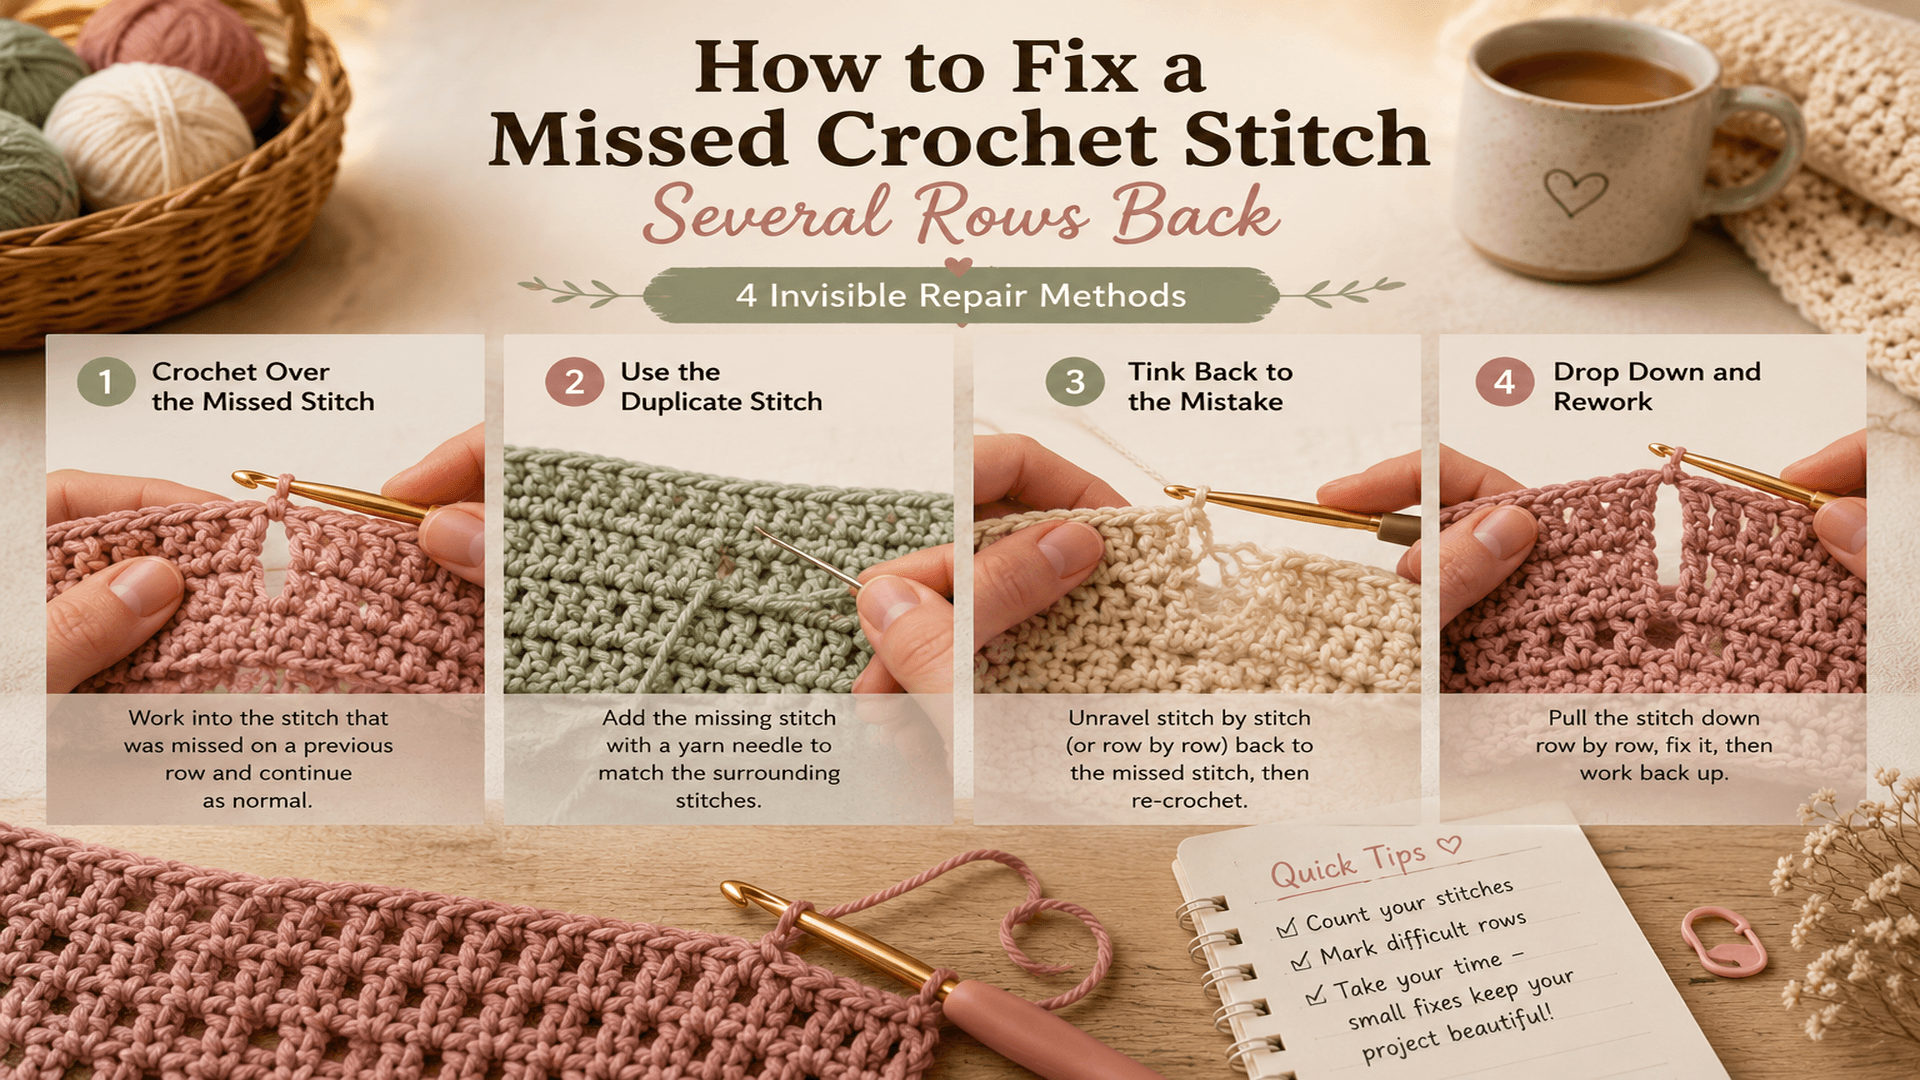
How to Fix a Missed Crochet Stitch Several Rows Back: 4 Ways to Repair Crochet Without Starting Over
Found a skipped crochet stitch several rows below your hook? Don't panic. A missed stitch can make your crochet look uneven, create a small hole, or throw off your stitch count—but you don't always have to unravel the entire project. In this guide, you'll learn how to fix a missed crochet stitch, when it's better to frog back to the mistake, and how to repair a small gap with a crochet hook or tapestry needle when undoing isn't practical.
Read tutorialReady to make something?
Put your new skills to use with our free pattern collection.